Flooded with hair many different hair stylings tools like hair straighteners, curling irons, or others, it gets confusing which tool will be the best for your specific hairstyle. Besides, you can do the same hairstyle with different styling tools.
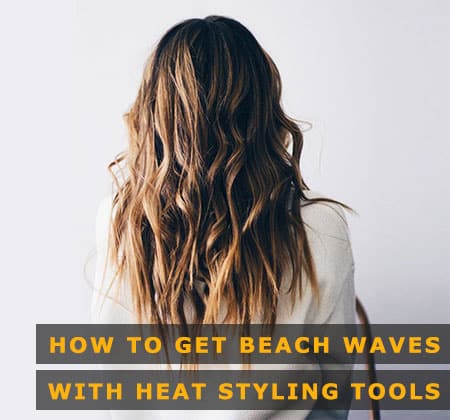
In that point, you may be curious to know with which one you can get the style done with ease. In this article, you will know about such a style that you can do with different heat styling tools. The name of the style is “Beach Wave” – which is a very popular hairstyle among women all over the world.
Usually, you hear people saying about making beach waves with a curling iron. But there are a lot of different styling tools in the market with which you can make beautiful beachy waves on your hair. Here in below you will know about those heat tools and will also know how to use them to make beach waves perfectly and beautifully.
1. Beach Waves with Flat Iron
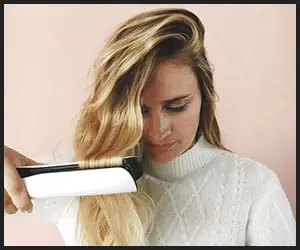
Beach waves are “easy-to-create” hairstyle. If you are in a hurry it can be your go-to style. But using different tools for different hairstyles is not easy. What if we can create perfect beach waves with the flat iron alongside straightening our hair? Life will get easier with some simple tricks.
Hair straightener or flat iron is one of the most efficient tools for creating beach wave. In some cases, if you use it properly you can get better beach waves than curling irons. Let’s see how you can do it. Here we have used GHD Platinum+ Professional Performance Styler flat iron. This is one of the best flat iron for beach waves.
- Step 1 – First, start with clean hair. It will help to achieve the hairstyle quicker and easier. But never try hot tools is your wet hair. Dry the hair properly and detangle it with brush or comb.
- Step 2 – Next important thing is to use a heat protectant. Without heat protectant, the percentage is really high that you will end up frying your hair. Or your hair gets damaged or frizzy permanently. For the beach wave, it is not necessary to straighten the hair. It will add texture later on.
- Step 3 – Now, take one section of your hair and start from the roots, the smaller your sections are the more texture you will get. Go over the hairs with your flat iron and from the part you want your beach wave to start then twist the hair around your flat iron. Twist the hair vertically. Keep twisting and pull away from the flat iron from your face. Do the same processes until you reach the ends. Repeat it until you are done with all of your hairs.
- Step 4 – When you are done apply some hair spray to set the waves. You can also apply a texturizing spray to add some extra texture and fullness in your hair. Our favorite texturizing spray is Kenra Platinum Dry Texture Spray.
2. Beach Waves With Curling Wand
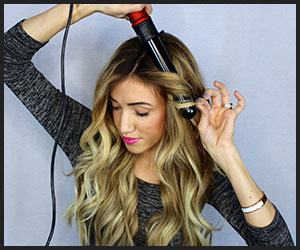
If you are newly using curling wands it may seem difficult to use it but after getting used to it is another easiest tool to use for hairstyling. With it, you can create many kinds of hairstyle. Beach waves are one of them. With curling wand, you do not need anything else other than the wand. So let’s see how to create a beach wave with a tourmaline hair straightener.
- Step 1 – Same as the flat iron, start with fresh and clean hair. Use brush or comb to detangle the hair. Prepare the hair for heat by applying a heat protectant.
- Step 2 – Make sections of your hair. Try to make a smaller section to create Volumizing look. Take 1-inch wand as well as a 1-inch section of your hair. After that twist the hair around itself and wrap it around the curling wand. Always warp the hair away from your face and around the face. Keep it for 5 to 10 second.
- Step 3 – Remove the curling wand from hair and unwrap it using your fingers. To keep the look natural you can take different size or sections and also you can warp the hair alternatively. Leave the hair straight from 1-2 inches from the ends. Repeat this until you are done with all of your hair.
- Step 4 – Apply some hair spray to set the beach waves. Here you can also use the texturizing spray to add some extra texture and finish the look.
3. Beach Waves With Hot Rollers
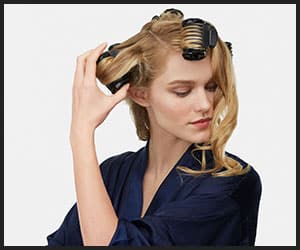
The hot roller is a great handy tool in terms of making supper lucrative curls. But you can also make beach waves with this tool very conveniently. It is a gentler method to get the beach waves on your hair. Unlike curling iron, you do not need to use a large-barrel curling iron and get less damage from hot rollers than a regular curling iron. However, styling with hot rollers takes more time comparing to other tools.
Also Check Out: Edge Flat Iron
- Step 1 – First, plugin and turn on the hot roller. Leave the rollers to get heated up. In the meantime, you can dry your hair.
- Step 2 – After drying your hair well, spray some sea-salt styling spray. But why is that? Because sea-salt spray prevents your hair becomes greasy, sticky or hard. This is mandatory to have perfect beach waves. You can get this from online, drugstore or saloon. Or make it with your own. Just mix 1 teaspoon of sea salt with a cup of water and pour the solution into a bottle and spray on your hair. But we recommend buying a professional one for making better beach waves. You can use Verb Sea Texture Spray or Herbivore Botanicals – All Natural Sea Mist Hair Spray. However, after spraying stick the top section of your hair with a large salon clip and place it at the top of your head. Then brush the bottom section of your hair with a wide-toothed comb, like Ouidad Double Detangler Comb. Comb your hair section by section (with a 2-ich piece of hair).
- Step 3 – Now put the rollers horizontally and wrap the middle section of your hair over it. For instance, if your hair is 10 inches long, place the roller on your hair about 5 inches from your scalp. Wrap the rest of the lower part of your hair around the roller in spiral form. Try to avoid overlapping the hair.
- Step 4 – Keep rolling the bottom section of the hair with different sizes of hot rollers and section the part with different width as well. This will create a good beach shape and texture on your hair.
- Step 5 – Leave the rollers as it is for about 12-15 minutes or until it becomes cool down completely. After cooling down, remove the rollers and brush very gently. You can run your fingers through your hairs to create uneven center parts and good texture. Apply a setting spray or mist to hold the style in place for a longer time.
Conclusion
Whatever tool you use, with the right procedure and products, you can get beautiful beach waves that everyone praises. We have shown how you can get beach waves with 3 different heat styling tools as everyone does not have the same tool in their home. If you have one of these tools at your home, you can easily get your desired beachy waves. Just follow the steps properly and use the products we have mentioned above. Happy styling.
Check this web story about beachy waves hairstyles
- About the Author
- Latest Posts
Writer and Content Manager at InStraight. Lovella’s philosophy is that everybody’s beauty is merely a reflection of loving yourself . ♀️ She loves to write and discover new cultures. Find her on Facebook

Hi there!
I must say that you come with some really amazing ideas to write articles on. It’s a comprehensive and well-put-together article with adequate information. I have read this piece of writing from start to finish and I loved every section of it.
I adorn my short tresses with luscious beach waves using a 1-inch flat iron. My hair never suffered from any breakage or damage and looks absolutely gorgeous throughout the day.
To all the girls out there, don’t waste your money on other styling tools to create beach waves in your hair. Trust me a flat iron works just as well.
Much love!
Regards,
Wanda T. Dumont
Dear Wanda,
First of all, thank you very much for your kind words. We appreciate our readers’ feedback.
Secondly, thanks again for sharing your experience with us. We are sure that our readers will be greatly benefited from this.
Please keep coming back for more informative articles.
Hello,
I have always liked your blog. Every time I faced any hair related problem or wanted to know about something, your blog is my only “go-to”.
However, I cannot say the same for this article. The idea is good. But the way you described each step is not satisfactory at all, especially in the “Beach Waves with Flat Iron” section. I seriously didn’t understand what you have explained is the 3rd step.
Moreover, you didn’t recommend enough products. I would have loved to go through a rich content. But this content is very poor. If I could, I would have rated it with 0 stars.
Please improve your writings. Otherwise, your readers will lose trust in you.
Dear Blanche,
Thank you very much for taking the time and writing to us. We appreciate our readers’ response.
We are sorry that you didn’t find this piece of writing particularly interesting. We would try to improve and write better in the future. Please keep coming back for more articles.
Hi there,
I use Velcro rollers and they produce gorgeous beach waves in my hair. Plus these rollers are also inexpensive. Why didn’t you include Velcro rollers on this list? Don’t you think they are capable of creating luscious beach waves?
Waiting for your reply!
Dear Christina,
Thank you for taking the time and writing to us.
Well, there is no doubt that the Velcro rollers can create amazing beach waves. However, as we are only talking about heated styling tools here, we didn’t include Velcro rollers.
We hope this would satisfy your queries.