You will have an innovative tool in your home – the Hairbrush Straighteners if you like to straighten up your hair daily, but want to reduce the time you spend doing it and the possibility of harm without losing the value of your look.
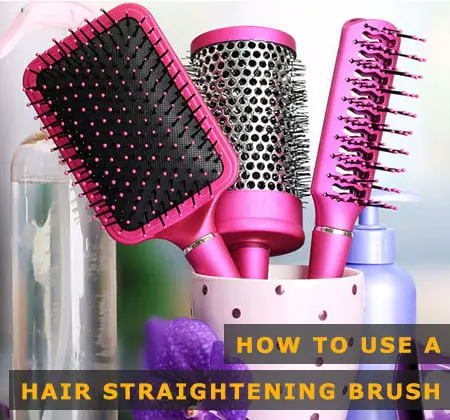
Straightening Brush is a device that tends to straighten the hair by keeping it sleek and shiny. Although it requires heat, the brushes are usually considered a little better and probably a cheaper option to straighten your hair.
The types of straightening brush bring effects on the overall result. We recommend a round brush for people with long hair and angled or flat brushes who have short hair. Let’s jump into the main discussion.
READ MORE: Hair Straightener vs Brush: Which is Better?
Prepare Your Hair
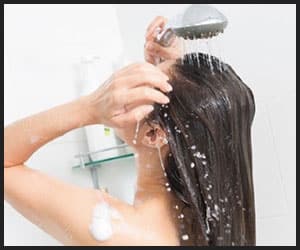
The first thing we want to let you know that if you are washing your hair then it is suitable to do it before you straighten it out. The exposure of your freshly straightened hair to water will allow you to reform and release your natural waves and curls. And washing your hair before you start styling will help you stay fashionable for longer, and if it is clean anyway it will look and feel much better!
Protection is a Must
Using a heat protectant after you shampoo and wash your hair before using a straightening brush is a must. It can be obtained in serum, oil, or spray form so that you can choose a type that suits your hair type. It nourishes the hair and provides them with a little extra thermal strength. Of course, your hair is gentler on straightening brushes than conventional flat irons, but you still have to care for them, so do not compromise this step at any cost.
Spray some protectants in your hands or you can spray directly on your hair. Then use your fingertips to move through your hair. Make sure you have plenty on your ends, as it is the most fragile and can be damaged easily. In addition, you may prefer to add it right down to the end and then work it upwards with your hands, because this avoids any substance from being applied to the roots that might otherwise make it seem lubricious.
You should not be confused between a regular hairbrush and a straightening brush. As the functions of these two are totally different. A straightening brush should not be used when you have knots in your hair, nor to detangle those. Before starting to use the straightening brush, you should use a regular brush or a wide-tooth comb to detangle the knots and then use the straightening brush.
Thoroughly Dry Your Hair
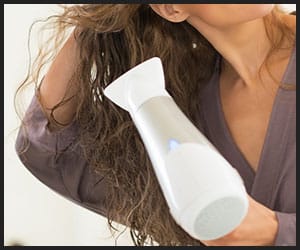
There are two ways to dry your wet hair. Either you have to use a blow dryer or simply air dry. But before using a straightening brush, you must dry your hair because the temperature of the brush is very high which can damage your hair permanently if it is wet. One side note, if you dry your hair with a blow dryer, you also can detangle your hair while drying simply using a comb attachment with it.
Section Up Your Hair
Slightly wavy or curly hair needs to be divided less. But if you have thicker hair, you have to divide your hair into a greater number of sections. Though, irrespective of how dense, you will have to divide it approximately in right, left, and back, or you can punch it all up the head and slowly fall small sections as you maneuver around it. It’s a good practice to pin it up if you have some hair clips.
Set the Right Temperature
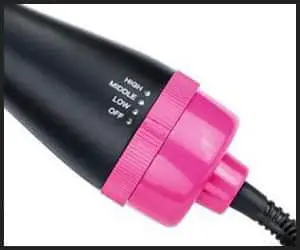
Switch on the straightener of your hairbrush and set the correct hairdo temperature. Use the ideal temperature relying upon the type of your hair. The “plus” and the ‘minus’ signed buttons in the device will enable you to control the temperature. On the off chance that your hair is kinky and tangled, you can expand the temperature by pressing the plus button to fasten however if your hair is fuzzy, it needs constrained temperature. In addition, colored hair needs a lower temperature than ordinary hair type, yet we propose that you start at the most minimal temperature and raise it if necessary.
Start Brushing
Taking the primary segment of hair in one hand, at that point keep the hairbrush straightener at the roots, yet underneath your hair, with the goal that the fibers stick out. It invigorates the skin some raising and at the roots, in this manner successfully straightening it.
Place the hair bundle through the bristles and brush the hair strands firmly however delicately. For this, you need to utilize little hair packs. When you cannot see through the hair pack the tips of the bristles, which means you are using a too huge bunch of hair at a time. This will guarantee the heat will not consistently hit the strings, so you will not get the perfect outcomes and it will take longer.
Try not to brush through too rapidly, generally, the heat will not have a chance to follow up on the hair. At that point, brush gradually, yet do not begin and stop, or the hair can be overheated.
We find that it is ideal to begin from the back and work in reverse, at that point once you’ve finished that point, let some more hair down from the top and start taking a shot at that locale from the back to the front.
Related: How to Clean Straightening Brush
Set Your Style
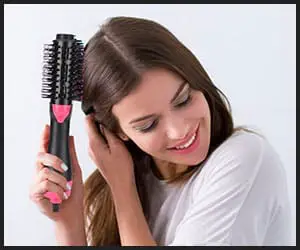
When you are finished straightening all the sections of your hair and get a new straightened hairstyle, switch of the brush and let it cool down. Now, this is time to set your hairstyle in place. There are many hair spray products available in the market that can set this style for a long time. Here is a pro-tip, you can actually use a heat protectant spray as a hairspray. So, it can be an economic solution, no doubt.
Do not forget to clean up the brush with a clean cloth to remove any kind of residue. It will definitely increase the lifespan of the brush and give you fewer complications in the future.
Hold the Style Longer
If you wash your hair every day you will notice that your straightened hair is going back to its usual shape very soon. But if you are not washing your hair every day the straightness holds for a few days. In the event that it starts to spring back to the usual shape despite not washing hair every day, you can touch it up with your straightening brush again but this time, you are not going to need a high temperature to style. Begin with the lowest temperature and you will have your work done. But if it is not working, begin to increase the heat gradually.
Final Thought
We want to end up our discussion by giving you some pro tips, which are, if considered, will boost up the result very positively. First of all, you ought to get a brush with tourmaline covering or ceramic plates and the bristle type is either nylon or boar. These materials will in general heat up speedier as it kills flyaways and frizzes, leaving your hair delicate and smooth. Furthermore, these bristles are commonly the mildest on your scalp and will not make your hair break. A padded-handle brush will give you solace. If you ensure these, we guarantee that your straightening experience will be very satisfactory.
Sources
- Beauty Hair, How to use a hair straightening brush, Apr 11, 2018
- About the Author
- Latest Posts
Lily is the Editor-in-Chief and one of the writers here on InStraight and ThoseGRACES.com. Growing up with thick hair that has a mind of its own, she’s always been passionate about finding the gentlest yet most effective products to help tame her wild mane. You can find more about her HERE. FOLLOW HER on FACEBOOK.


Wow, guys! Just Wow!!
I am just surprised. How you people come up with such varieties of ideas!! It is very applaudable. All your articles are very helpful and this is no different. This piece of writing is well put together with a bunch of useful information which made it very interesting to read. The step by step guide to how to use a straightening brush would be very helpful for everyone, especially for someone like me who didn’t use a straightening brush before. Very nice work.
Keep up the good work guys.
All the very best!
Dear Angie,
Thank you very much for your kind and sweet words. We are overwhelmed with your response. Our readers’ feedback is what inspires us to write better.
Please keep coming back for more articles in the future.
Hello there,
First things first, this is a very sought out, well put together piece of writing. I enjoyed it thoroughly. I especially loved the fact that you have explained the method of using this brush in a step by step manner. This is very easy to read and understand.
Now getting to the point. If I don’t want to wash my hair before the straightening process, what should I do? Should I start using the straightening brush on my dirty hair?
Please suggest to me. I am waiting for your answer.
Thanks in advance.
Good luck.
Dear Gloria,
First of all, thank you very much for your kind praising words. We are overwhelmed with your response.
Secondly, always remember that you should never style your dirty hair. if you don’t feel like washing the tresses with shampoo and water, you can always clean them with dry shampoo. It will clean your manes thoroughly and build a base for the straightening process.
We hope this would help you.
Hey guys,
At first, I want to clarify that it’s not a paid review. I am writing what I feel and understand.
Now, dear, I would like to appreciate you for the effort and time you gave in penning this blog. It’s amazing, in one word. I enjoyed reading every part of it. This will act as a guide to the girls who have never used a straightening brush. It’s really applaudable. Always good wishes to you and your blog!
However, while reading through it, a question hit my mind. If I air dry my hair instead of using a hairdryer, won’t the straightening process be as smooth? Please answer me. I don’t want to use excessive heat on my fine sensitive hair.
Thanks
Margaret
Dear Margaret, first of all, thank you very much for taking the time and writing such sweet words. We are overwhelmed with your feedback.
Secondly, it doesn’t matter if you air dry your manes or use a blow dryer, before using the straightening brush make sure that your tresses are dried. We have mentioned hairdryer because it makes the styling process quicker.
We hope this would help you.
Please keep coming back for more articles in the future.