A wall-mounted mirror is undoubtedly among the wishlists of those who love to enjoy their makeup sessions from every possible angle.
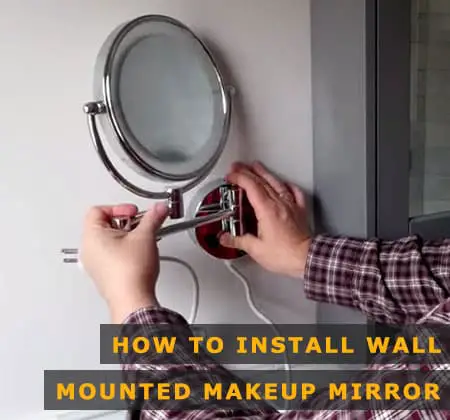
And of course, it’s convenient for dress-up assistance for those who won’t tolerate a fraction of error in their appearance.
The installation involves the attachment of a mounting plate to the wall before securing in the mirror on it.
Since a poor installation job will give you nothing but a long-term headache, here I’ve come up with a step-by-step guide.
This post contains affiliate links. We earn a commission if you make a purchase.
Items Needed For the Installation Of The wall-mounted makeup mirror
- The wall-mounted lighted makeup mirror
- A drill screwdriver for the final installation of the screws
- Anchors for the screws
- A hammer for installing the wall anchor
- A pencil or a nail for marking the holes
- A stud finder (if necessary)
Once you have all of the items ready, follow the instructions as I’ve shown in the steps below. For this tutorial, I’ve used Pansonite B07KWBPGF2 Model as it is one of the top-rated wall-mounted makeup mirrors on the market.
Step-1
First off, you should determine where and how you’ll use the mirror. The first thing to consider is the height above the makeup desk. You’ll want it as convenient as possible. Be sure to keep the placement a bit under your eye level.
In most cases, the right measurement is 54 to 60 inches above the finished floor, while for a seated person, the range of 37-44 inches should be good enough. But again, it’ll mostly depend on user preference.
Related: Cozzine wall mount makeup mirror review
Step-2
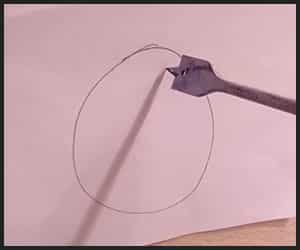
Now, make a mark on the backing where you’re supposed to attach your mirror using the pencil. For finding a suitable stud if necessary, you can use the stud finder. Remember to place the center of the mounting plate of the mirror on the mark.
Step-3
After you’ve found and marked a suitable position for the mirror-base, you now need to mark where the holding screws are supposed to be.
Here’s a tip- use the mounting plate of your mirror as the template for marking the screw spots. Make as many marks as the number of potential connector screws.
Step-4
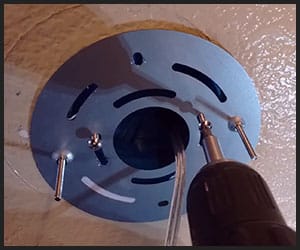
Drill into the marked spots for pilot holes for the screws. Make sure you drill as deep as the screw’s length so that there remains no gap between the base of the mounting plate and the wall. Hammer down the anchors in place.
Step-5
It’s time for the main job now. Attach your mirror’s mounting plate with the screws using the screwdriver. Make sure you do it carefully enough, so you don’t crush your drywall. Also, you need not overtighten the screws, for it can scrape off the wall for a loose attachment later on.
Step-6
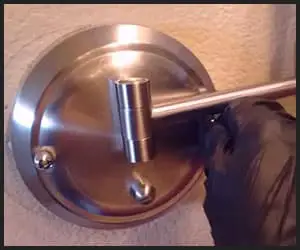
Finally, after making sure that the mounting plate is seated firmly in place, you can now attach your mirror onto it. The mirrors mostly connect with the decorative nuts that come within the package. You can easily secure the mirror with them by your hand.
That’s it! You’re all done.
Must- Read: Simplehuman makeup mirror review
Tips for Installation
Now, if you decide to go for an electrical makeup mirror instead of a regular one, you’ll find the process pretty similar. Only you’ll have to have the primary knowledge of making wire connections.
As for the required supplies, you don’t need much either. A screwdriver for tightening the screws and pliers for necessary wire adjustments should be enough.
This type of mirror comes with an additional back panel that attaches to the wall before the mounting plate. So, what you’ll need to do here is to affix the electrical box panel with the given screws and wall anchors after step-2, and make the wire connections before proceeding to the steps that follow by.
And don’t worry if your mirror comes with a shorter cable that can’t reach the power outlet. An electrical cable extension of the necessary length will simply do the trick.
Final Say
Hopefully, this simple installation guide will be helpful. If you have any further queries, let me know in the comments below.
Sources
- David Brown, How to Install a Wall-Mounted Makeup Mirror, July 17, 2017
- About the Author
- Latest Posts
Sylvia is one of the most joyful people you’ll ever meet. She is a high advocate of self-love and encourages women to take care of themselves both mentally and physically. She loves girly talks especially salon talks (a little gossip doesn’t hurt) and spends most of her free time on skincare or hair care. You can find more about here HERE. Find her on LINKEDIN
